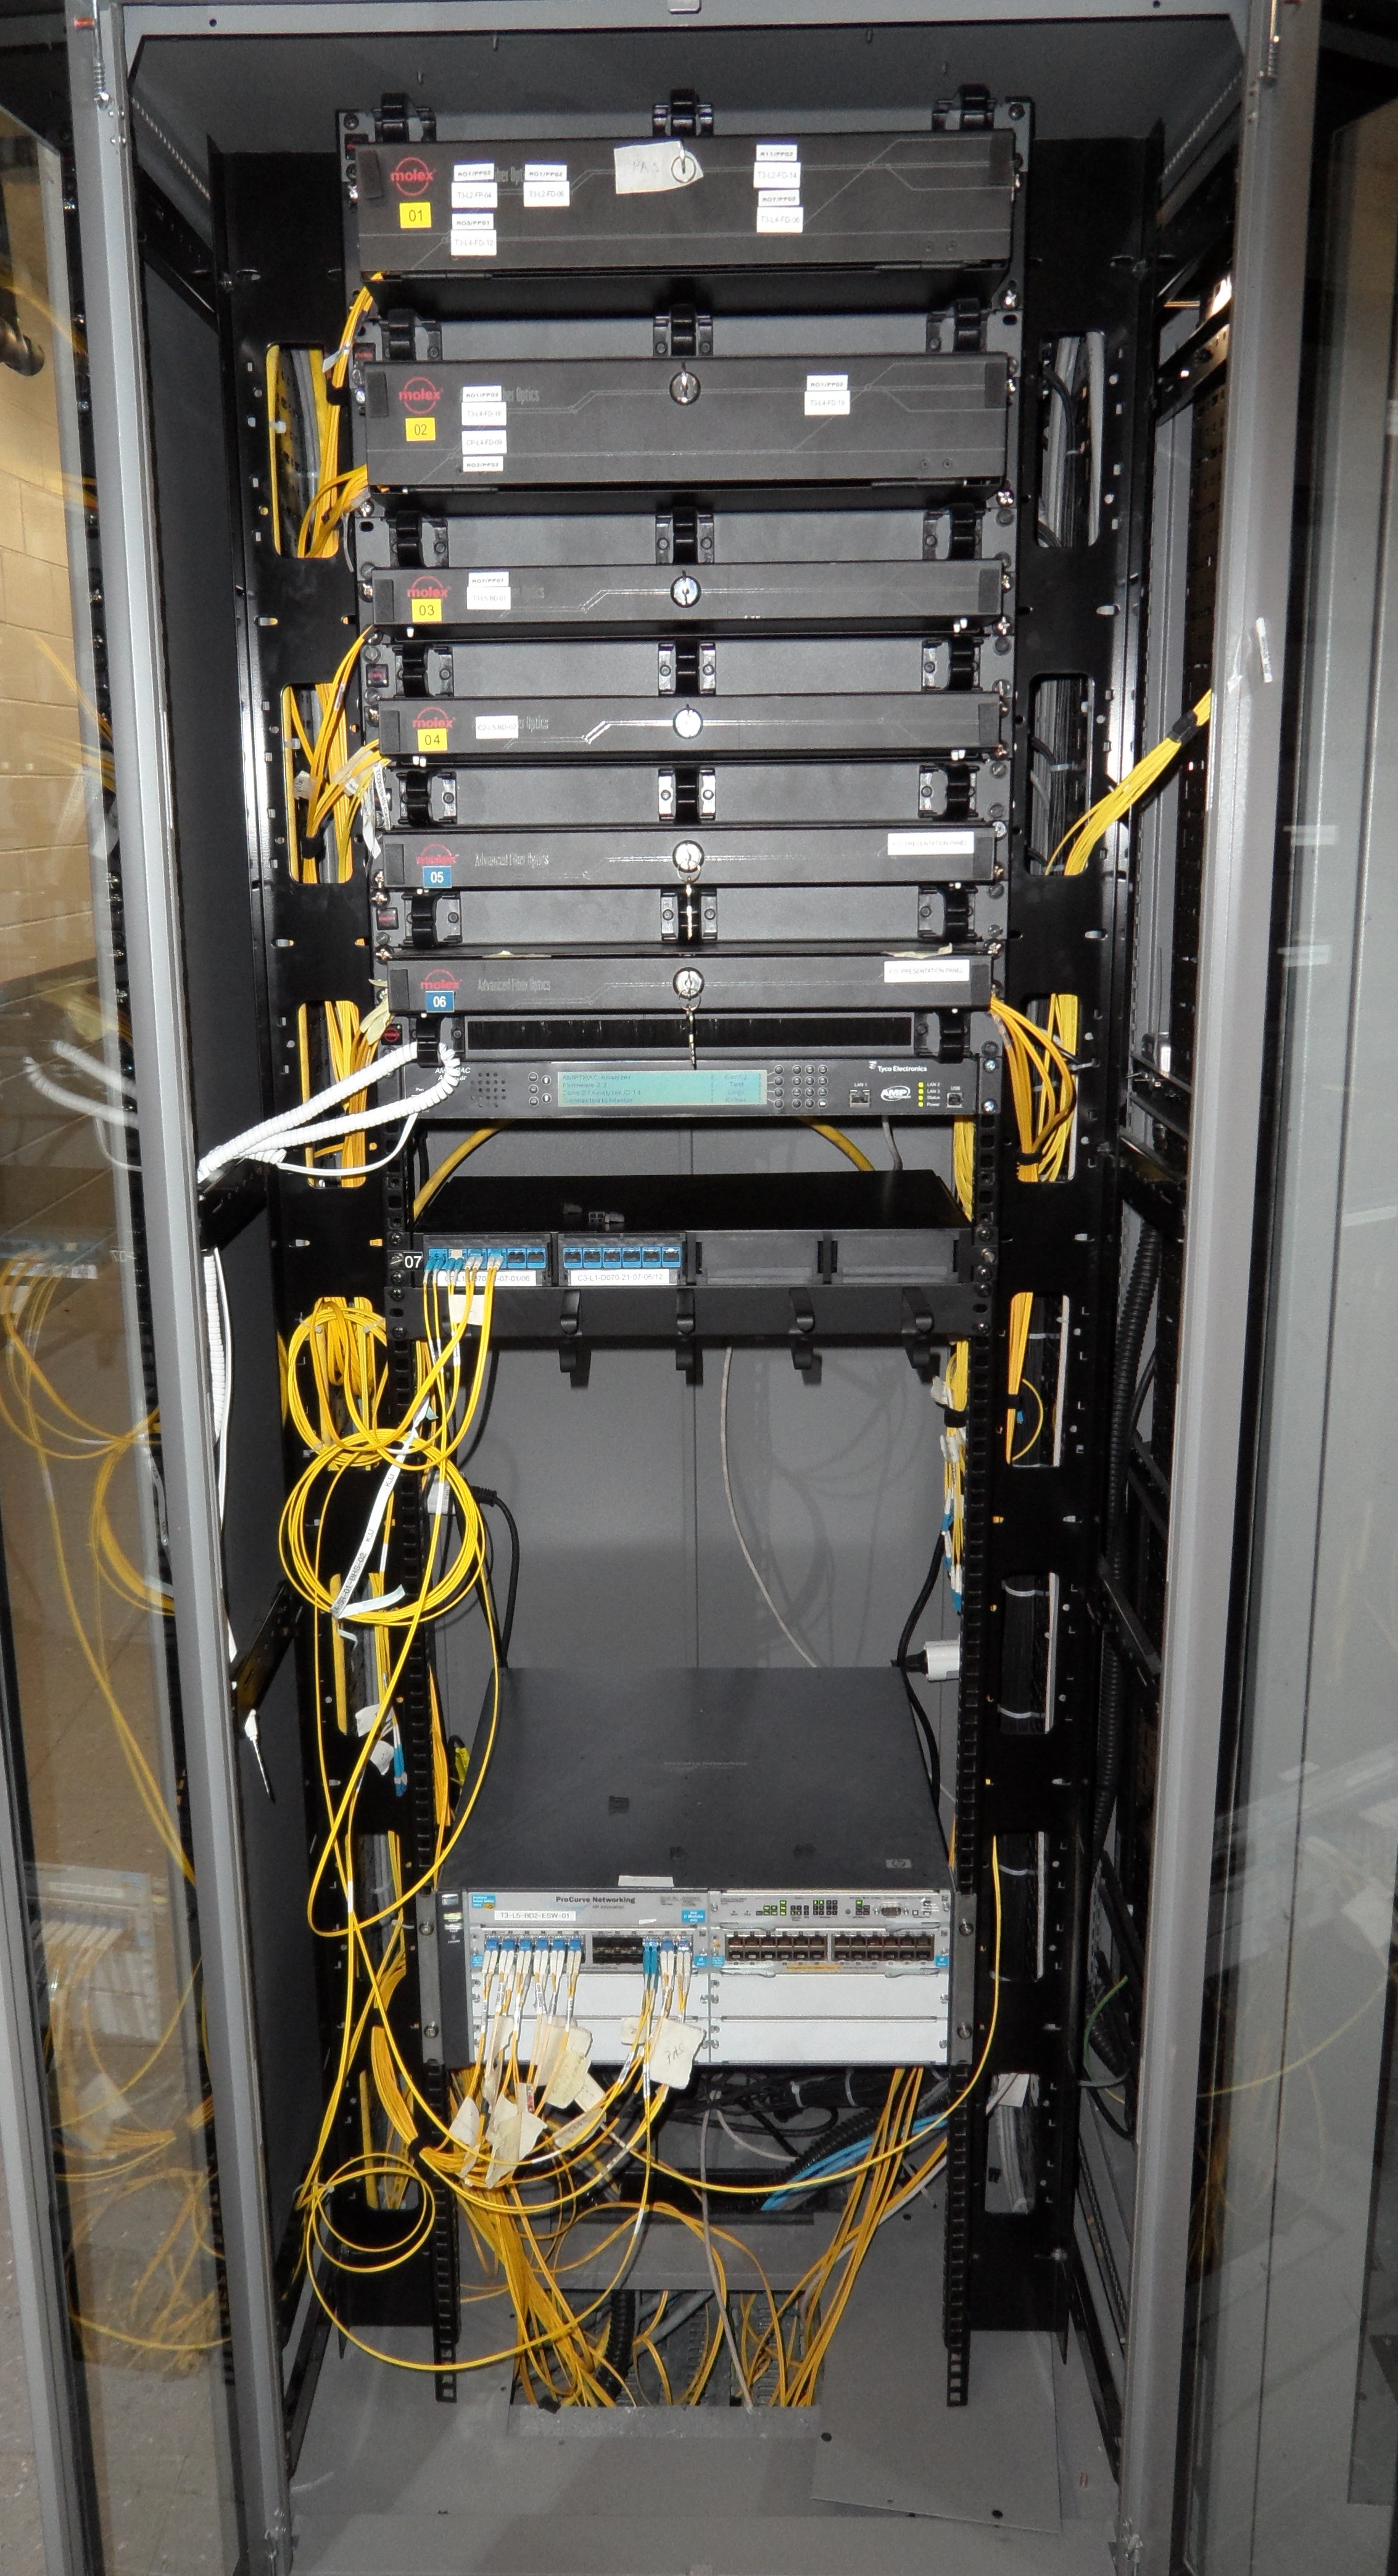
Fiber Optic Network Installation Kenya is a practical service search for homes, offices, schools, hotels, apartments, hospitals, factories, warehouses, CCTV projects, data rooms, campuses, and internet service providers that need fast, stable, and scalable connectivity. A fibre network installation is more than pulling a cable from one point to another. It includes site survey, route planning, cable selection, duct or wall preparation, cable pulling, splicing, termination, testing, labelling, router integration, switch configuration, Wi-Fi planning, documentation, and support.
Many network problems begin during installation. A cable may be bent too tightly, routed through a risky area, left exposed outdoors, terminated poorly, spliced with high loss, connected to the wrong SFP, or installed without labels. The link may work on the first day but later fail during rain, construction, cabinet changes, power problems, or normal growth. A professional fibre optic network installation prevents these problems by treating the route, optical link, active equipment, and user experience as one system.
This guide explains how fibre optic network installation works in Kenya, what happens during a site survey, which cable types and equipment may be required, how installers test the final link, what affects cost, and how to choose the right installation team. For related planning, read our internal guides on Fiber Optic Cable Kenya, Fiber Optic Internet Kenya, Fiber Optic Technicians Kenya, and Fiber Optic Solutions Kenya.

What is fibre optic network installation?
Fibre optic network installation is the process of building a working data network using optical fibre cable. The fibre may connect an internet provider to a home, link two buildings, connect CCTV cameras to a control room, distribute internet across floors, connect a server room to remote cabinets, or support a business network across a campus. The goal is to create a reliable optical path that can carry data at the required speed with acceptable signal loss and room for future growth.
A complete installation includes physical and technical work. The physical work includes measuring the route, selecting cable, installing conduits or trunking, pulling cable, protecting outdoor sections, mounting boxes, and preparing cabinets. The technical work includes splicing, termination, patching, optical testing, SFP matching, router or switch integration, Wi-Fi design, network separation, and documentation. If either side is weak, the final network can become unreliable.
In Kenya, fibre installation projects vary widely. A small home installation may involve a drop cable, ONT, router, and Wi-Fi checks. A business installation may include single-mode fibre between cabinets, managed switches, firewall configuration, VLANs, CCTV separation, guest Wi-Fi, and UPS power. A school or hotel may need fibre between multiple buildings with labelled cores and several access points. The installer should adapt the method to the site, not use one generic approach for every job.
Why installation quality matters
Fibre can deliver excellent performance, but only when installed correctly. It has high bandwidth, low signal loss, and strong resistance to electrical interference, yet it still needs careful handling. Tight bends, crushed cable, dirty connectors, poor splices, water ingress, wrong patch cords, and mismatched optics can all create faults. Some faults are obvious immediately, while others appear later as slow speeds, random drops, weak camera feeds, or complete outages.
Good installation also protects your investment. Pulling fibre through ceilings, ducts, walls, trenches, and risers can be disruptive. If the wrong cable is used or no spare cores are left, upgrades become expensive. If routes are not labelled, future repairs take longer. If testing is skipped, you may not know whether the link is healthy until users complain. A proper installation reduces downtime and makes the network easier to support.
For businesses, installation quality affects revenue and operations. Online payments, cloud systems, phone calls, CCTV, remote work, customer service, hotel guest internet, school systems, warehouse applications, and hospital systems all depend on stable connectivity. A cheap installation that fails repeatedly can cost more than a professional installation that is tested and documented from the beginning.
Step 1: Site survey and requirements
A fibre optic network installation should begin with a site survey. The installer should inspect the building, compound, ducts, cabinets, roof routes, wall paths, poles, ceilings, risers, and endpoint locations. They should ask what the network will carry: internet, CCTV, Wi-Fi, VoIP, access control, server traffic, guest traffic, business systems, or all of them. The answer affects cable type, core count, equipment, route protection, and testing requirements.
The survey should also identify users and critical locations. In a home, that may include living rooms, home offices, bedrooms, and outdoor spaces. In an office, it may include departments, meeting rooms, reception, server room, and guest areas. In a school, it may include administration, labs, classrooms, dormitories, library, and CCTV points. In a factory, it may include production areas, warehouses, gates, and offices. The network should be installed around real use, not only the easiest cable route.
During the survey, ask about growth. Will more cameras be added? Will another floor be occupied? Will the business add VoIP? Will a school add a computer lab? Will tenants need separate internet? Will a hotel add smart TVs? Future needs influence spare fibre cores, cabinet size, switch capacity, access points, and backup internet planning.
Step 2: Cable route design
Route design determines how the fibre will move from source to destination. Common routes include ducts, ceilings, risers, trunking, wall conduits, aerial pole routes, trenches, and cable trays. Each route has risks. Ducts may be blocked or flooded. Ceiling routes may have sharp metal edges. Outdoor walls may expose cable to sunlight and impact. Aerial routes need correct support and clearance. Trenches need depth, warning tape, and protection from future digging.
The route should protect the fibre and remain maintainable. Avoid areas where the cable can be stepped on, crushed by furniture, cut during renovations, pulled by staff, damaged by rodents, or exposed to water. Wall entries should be sealed. Outdoor sections should use suitable cable and closures. Cabinet entries should be neat and labelled. If a route crosses a shared building area, get permission from the landlord, caretaker, estate office, or building manager before work starts.
Good installers also allow service loops. A little spare length at cabinets, termination boxes, or closures helps with future re-termination and maintenance. However, spare cable should be coiled properly and not bent tightly. Fibre must be handled according to its bend radius.

Step 3: Choosing the right fibre cable
The right cable depends on distance, environment, route, bandwidth, and future plans. Single-mode fibre is usually preferred for long-distance links, outdoor routes, building-to-building links, ISP work, campus backbones, and future-proof business networks. Multimode fibre may be suitable for short indoor data room links, but it is not usually the best choice for outdoor or long-distance work.
Indoor cable, outdoor cable, armoured cable, aerial cable, duct cable, and drop cable are designed for different conditions. Indoor cable may be easier to work with in controlled spaces. Outdoor cable protects against moisture and environmental stress. Armoured cable is useful where damage risk is higher. Aerial cable needs proper support. Drop cable is often used for final connections to homes or small offices. The installer should explain why a specific cable type is being recommended.
Core count also matters. A simple point-to-point link may use two cores, but installing only two cores can limit future growth. Four, six, twelve, or twenty-four cores may be more practical depending on the site. Spare cores can support future cameras, extra services, redundancy, or provider changes. Our Fiber Optic Cable Kenya guide explains these cable choices in more detail.
Step 4: Pulling and protecting the cable
Cable pulling must be done carefully. Fibre should not be dragged across sharp edges, pulled with excessive force, kinked, crushed, or bent too tightly. Where the cable runs through ducts, installers should check that the path is clear and use suitable pulling methods. Where it runs along walls, it should be clipped, trunked, or protected. Where it passes outdoors, it should be rated for outdoor use and protected from sunlight, water, impact, and tampering.
In commercial buildings, installation should be neat enough for future maintenance. Messy routes create confusion and increase the risk of accidental cuts. In apartments and estates, visible cable clutter can create complaints and access issues. In factories and warehouses, cable should be protected from forklifts, equipment movement, vibration, dust, water, and maintenance work. In schools and hotels, routes should avoid areas where students, guests, or staff can easily pull or damage the cable.
Do not rush this stage. A poor cable route may be hidden behind walls or ceilings and difficult to correct later. The installer should balance the shortest route with safety, protection, future access, and appearance.
Step 5: Splicing and termination
After the cable is installed, the fibre strands must be spliced or terminated. Fusion splicing joins fibre strands with low optical loss and is widely used for professional installations. Termination connects the fibre to pigtails, patch panels, adapters, ONTs, media converters, or equipment ports. Common connector types include LC and SC, depending on the equipment.
Splicing requires clean preparation. The technician strips the fibre, cleans it, cleaves it, splices it, protects the splice sleeve, and arranges it in a tray. Dirty fibre, bad cleaves, weak protection, and untidy trays can cause high loss or future failure. The splice closure, wall box, or patch panel should be closed properly and labelled clearly.
Connector cleanliness is important. Dust on fibre connectors can create signal loss and intermittent problems. Installers should use proper cleaning tools and dust caps. They should avoid touching fibre connector tips or leaving ports open unnecessarily.
Step 6: Network equipment integration
Fibre does not work alone. It must connect to active equipment. Depending on the installation, you may need an ONT, router, firewall, managed switch, SFP module, media converter, fibre switch, access point, OLT, or CCTV network switch. The equipment must match the fibre type, connector type, wavelength, speed, and distance. A single-mode link needs single-mode optics. A multimode link needs multimode optics. The wrong SFP can prevent the link from coming up or cause unstable performance.
For business networks, equipment planning is critical. Routers and switches may need VLANs, guest networks, bandwidth controls, firewall rules, VPNs, load balancing, and failover. CCTV should often be separated from guest Wi-Fi and business systems. Payment systems and administration computers should not sit on the same open guest network. Suppliers such as Mikrotik Kenya are useful when planning managed routing, switching, and wireless equipment around a fibre backbone.
Power protection is part of integration. A fibre link cannot serve users if the router, ONT, switch, or access point loses power. Use surge protection and UPS backup for network cabinets, especially in offices, schools, hotels, factories, clinics, and shops that depend on internet for daily operations.

Step 7: Testing the fibre network
Testing confirms that the installation is ready for service. Basic testing may include continuity checks and optical power readings. For longer or more important links, OTDR testing is useful because it can show distance, splice loss, connector loss, bends, breaks, and other events along the route. Test results help prove that the link was installed correctly and provide a baseline for future troubleshooting.
Testing should not stop at the optical layer. The installer should also test the active network. Does the switch port come up at the expected speed? Is the router receiving the internet link? Can users browse? Are upload and download speeds reasonable? Does Wi-Fi cover the intended rooms? Can CCTV cameras stream to the recorder? Do payment systems, cloud software, and video calls work? Real application testing catches problems that a simple light test may miss.
For businesses, keep test records. If performance drops later, previous results help identify whether the fault is in the fibre route, equipment, provider network, Wi-Fi, or application layer.
Fibre network installation for homes
Home fibre installation should focus on neat entry, safe routing, strong Wi-Fi, and user education. The installer should avoid placing the router where walls or distance will weaken coverage. If the home is large, has several floors, or has thick concrete walls, mesh Wi-Fi or wired access points may be needed. A high-speed fibre package will not feel fast if Wi-Fi cannot reach the rooms where people work or stream.
Home users should also understand how to protect the fibre cable. Avoid pulling the fibre drop, bending it tightly, moving the ONT carelessly, or unplugging connectors unnecessarily. If furniture is moved, make sure it does not crush the cable. If renovations are planned, mark the fibre route so workers do not cut it accidentally.
A good home installation should end with working internet, a clear Wi-Fi name, a strong password, tested coverage, and basic support information. If the home depends on internet for work, consider a UPS for the router and a backup connection.
Fibre network installation for offices
Office installations usually need more structure. A fibre link may enter a main cabinet and then distribute through switches and access points. Departments may need separate network areas. Guest Wi-Fi should be isolated. CCTV, printers, VoIP phones, servers, payment systems, and staff devices may need different rules. A business installation should be designed around workflow and risk, not only speed.
Office fibre backbones can connect floors, departments, meeting rooms, server rooms, and remote offices. The installer should label all ports and patch panels. Spare cores should be recorded. Switches should be mounted neatly and powered through protected outlets. Patch cords should be tidy so future maintenance does not accidentally disconnect critical services.
For organisations that cannot tolerate downtime, plan backup internet. This may be a second fibre provider, fixed wireless, mobile data, or satellite. Providers such as Amazon Internet Kenya and Satellite Internet Installers can support backup and remote connectivity planning where fibre coverage is limited or a second terrestrial route is unavailable.
Fibre network installation for CCTV
CCTV networks often need fibre because cameras may be far from the control room. Gates, perimeter walls, parking areas, warehouses, yards, schools, factories, farms, and estates can exceed copper Ethernet distance limits. Fibre allows long camera links and reduces electrical interference. It can also make the network easier to expand when more cameras are added.
A CCTV fibre installation should include camera bandwidth planning, switch placement, power supply, outdoor cabinet protection, media converters or fibre switches, labelled cores, and testing. The installer should coordinate with the CCTV team so camera addressing, recorder capacity, remote viewing, and network security are handled properly.
Security systems need reliability. If the fibre route is exposed, poorly spliced, or unsupported by UPS power, cameras may fail at the worst time. A professional installation protects the route and separates CCTV traffic from guest internet where possible.
Documentation and handover
Documentation is part of a proper fibre installation. The handover should include route notes, labelled ports, core allocation, cabinet photos, test results, equipment details, support contacts, and any passwords or configuration notes that the client is allowed to hold. This is especially important for schools, hotels, estates, offices, factories, and buildings with multiple tenants.
Without documentation, future support becomes slow and risky. A technician may not know which core serves which building, which patch cord goes to which switch, or where a route passes through the property. Good labels and records reduce downtime and prevent accidental disconnections.
Handover should also include basic user training. Staff should know how to restart equipment safely, who to call for support, which cabinet should remain locked, and why cables should not be moved casually. For business sites, assign one responsible person to keep network records updated.
What affects installation cost?
Fibre optic network installation cost in Kenya depends on distance, cable type, core count, indoor or outdoor route, duct condition, trenching, aerial work, wall penetrations, splicing, termination, patch panels, SFP modules, switches, routers, access points, transport, testing, documentation, and urgency. A short indoor link costs less than an outdoor armoured route between buildings. A simple home drop costs less than a school campus or factory network.
When comparing quotes, separate materials, labour, equipment, testing, and support. Ask whether the quote includes patch panels, pigtails, patch cords, splice trays, closures, labels, testing, and cleanup. Ask whether network configuration is included or charged separately. Ask whether the installer provides a workmanship warranty.
The cheapest quote can become expensive if it excludes critical items or uses poor materials. Fibre is infrastructure, so value should be measured by reliability, supportability, and future capacity, not only the lowest installation fee.
How to choose a fibre network installer in Kenya
Choose an installer who asks detailed questions and explains the design. They should understand fibre cable types, splicing, termination, optical testing, cabinets, SFPs, routers, switches, Wi-Fi, CCTV, and backup internet. They should be able to inspect the route, recommend materials, provide a clear quote, and explain what will be tested before handover.
Ask for evidence of similar work. Neat cabinet photos, labelled patch panels, test reports, and references are useful. Ask whether they provide fusion splicing, OTDR testing, emergency repair, and post-installation support. If the project supports business operations, confirm response times and support escalation before installation begins.
For more detail on technician selection, read our guide on Fiber Optic Technicians Kenya. It covers tools, skills, repair support, and questions to ask before hiring.
Common mistakes to avoid
- Installing fibre without a site survey or route plan.
- Using the wrong cable type for indoor, outdoor, duct, aerial, or armoured routes.
- Choosing too few cores and leaving no room for growth.
- Ignoring bend radius, cable protection, and service loops.
- Skipping optical power testing or OTDR testing on important links.
- Using incompatible SFPs, patch cords, or connector types.
- Installing fast fibre but using weak routers, switches, or Wi-Fi access points.
- Failing to label cabinets, patch panels, cores, and routes.
- Running critical business systems without UPS or backup internet.
These mistakes are avoidable. A strong fibre installation is designed, installed, tested, labelled, and documented. Shortcuts may save time on installation day, but they create support problems later.
FAQ: Fiber Optic Network Installation Kenya
How long does fibre network installation take?
A simple home or small office installation can take a few hours if the route is ready. Larger offices, schools, hotels, factories, estates, and CCTV networks may take several days depending on distance, access, splicing, testing, equipment, and documentation.
Do I need single-mode or multimode fibre?
Single-mode fibre is usually best for outdoor routes, long distances, building-to-building links, and future-proof backbones. Multimode can work for short indoor data room links. The installer should choose based on distance, equipment, and upgrade plans.
Can fibre be installed between buildings?
Yes. Fibre is ideal for building-to-building links. The route may use duct, trench, aerial support, or protected wall paths. Outdoor-rated cable, proper closures, testing, and surge-safe equipment planning are important.
Does fibre installation improve Wi-Fi?
Fibre improves the backbone and internet feed, but Wi-Fi still depends on router placement, access points, walls, interference, and device load. Large homes and businesses often need access point planning in addition to fibre installation.
Should installation include testing?
Yes. At minimum, the installer should confirm continuity and optical power. For longer or critical links, OTDR testing is recommended. Real application testing should also be done before handover.
Final advice
Fiber Optic Network Installation Kenya should be handled as a complete network project, not a quick cable job. The best installations begin with a survey, use the right fibre cable, protect the route, splice and terminate cleanly, integrate compatible equipment, test the link, document the network, and provide support. That approach gives homes, offices, schools, hotels, factories, and CCTV projects a network that can grow without constant repair.
If you need fibre installed for internet, CCTV, building links, office backbones, school networks, hotel Wi-Fi, or business continuity, start with a professional survey. You can book fibre optic network installation in Kenya so the route, equipment, cost, and support plan are clear before work begins.